Query Reports
(Feature available only in the Enterprise Edition)
Password Manager Pro allows you to create query-based reports to extract specific data from the Password Manager Pro repository, either by writing your own SQL query or customizing a SQL query from existing reports under this category.
With query reports, you can use SQL statements to query the database directly, fetch information from provided tables, and format the data into a report. For instance, using queries, you can create reports for the following sample scenarios (scope not limited to this list):
- Passwords that haven't been changed after being used for auto-logon to target system.
- Passwords that haven't been changed at all after resource creation.
- List of identical user groups (groups that have the same set of users).
This document walks you through the following topics:
- Creating Query Reports
- Use Case Scenarios
- Scheduling Query Reports
- Terminating an Already Created Schedule
- Creating Favorite Reports
- Managing Categories
1. Creating Query Reports
You can run query reports in Password Manager Pro in two ways, either by using default queries or by constructing your own SQL query by referring to the Tables Schema displayed in the product interface. Default query reports can be found under pre-defined categories - Resource Groups, Resources, User Groups, and Users.
You can use these default reports as such or edit the queries and save them as new reports. Or, to create a new query from scratch using your own SQL query, follow the steps given below:
- Navigate to Reports >> Query Reports.
- Click on Create Query Report, available on the top-right corner.
- In the wizard that opens, provide a name for the query report being created, and enter a description for easy identification of the report.
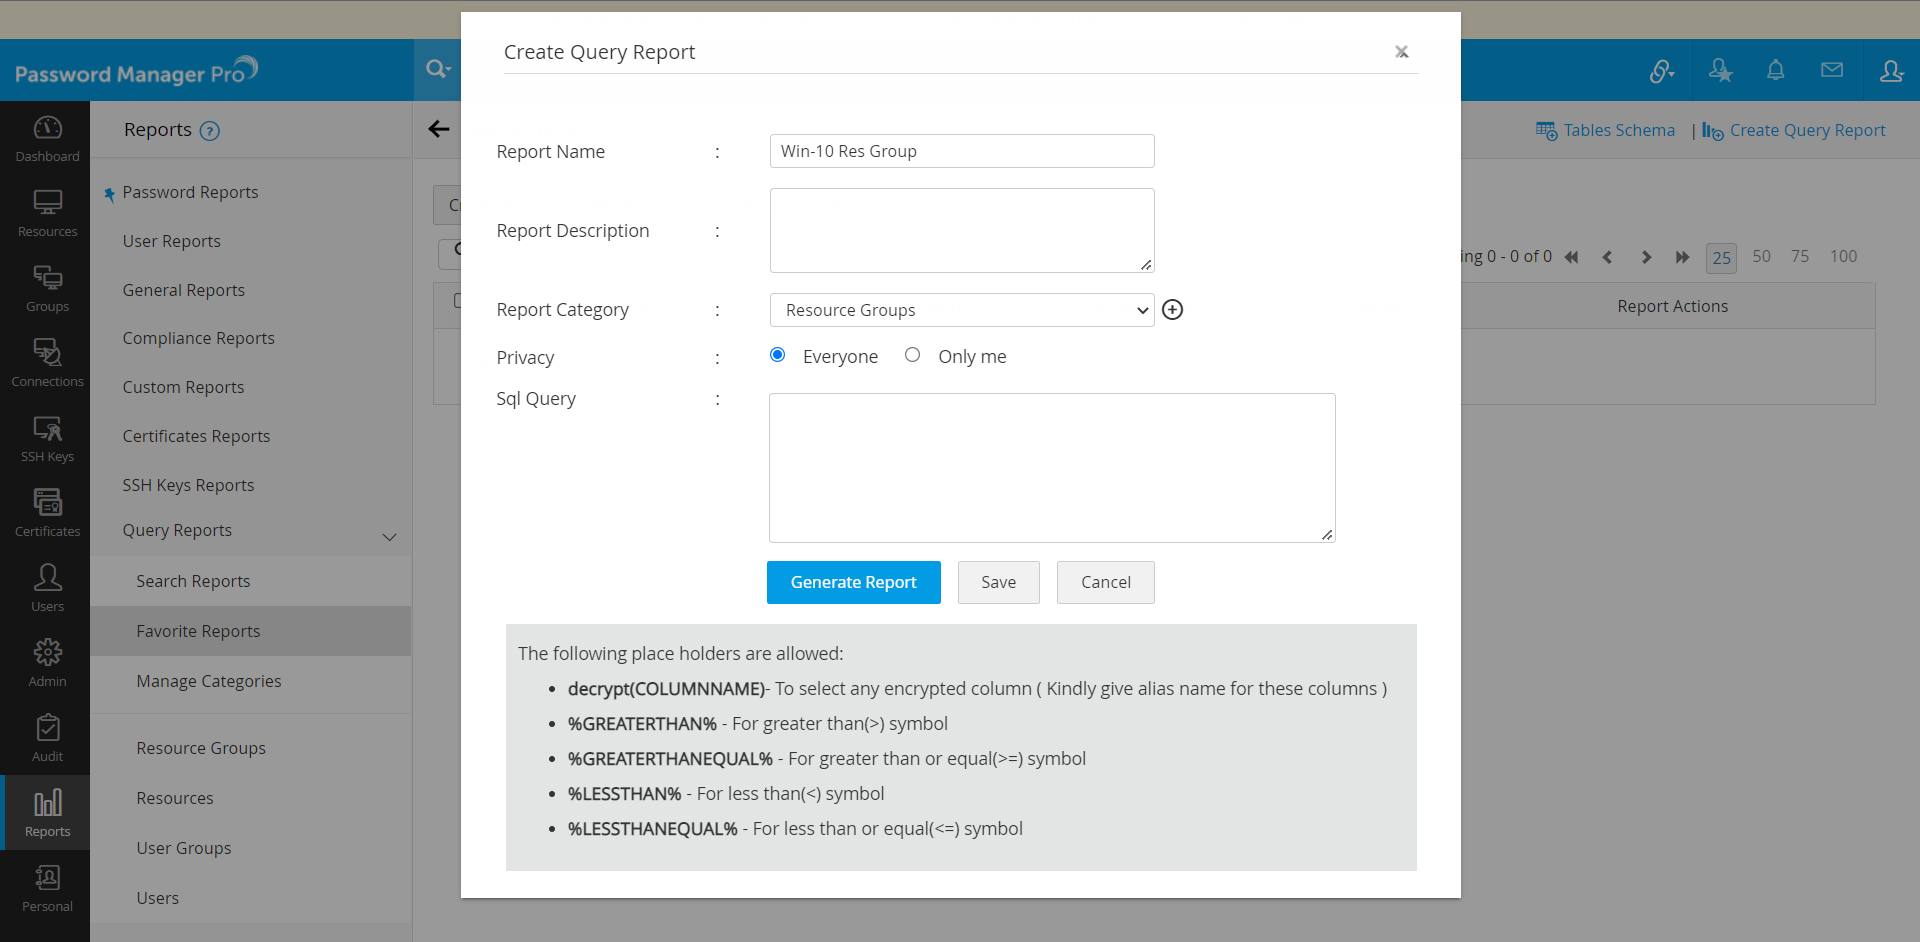
- Next, select Report Category for the report. You can either choose one of the pre-defined categories or add a new category. To create a new category, click the + icon beside the Report Category field.
- Set Privacy for the report—Everyone (or) Only me—depending on data sensitivity and need.
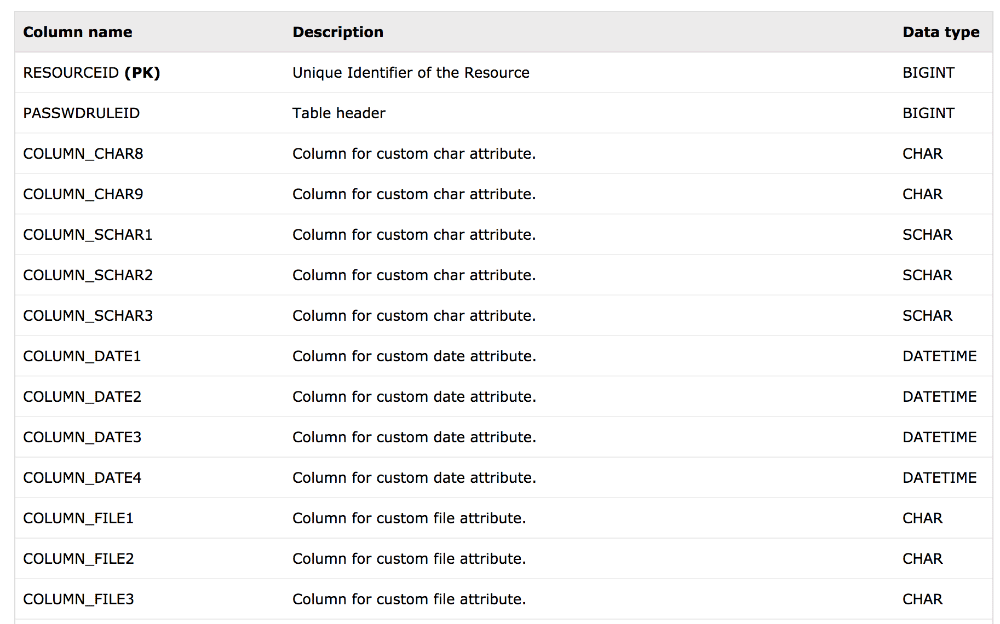
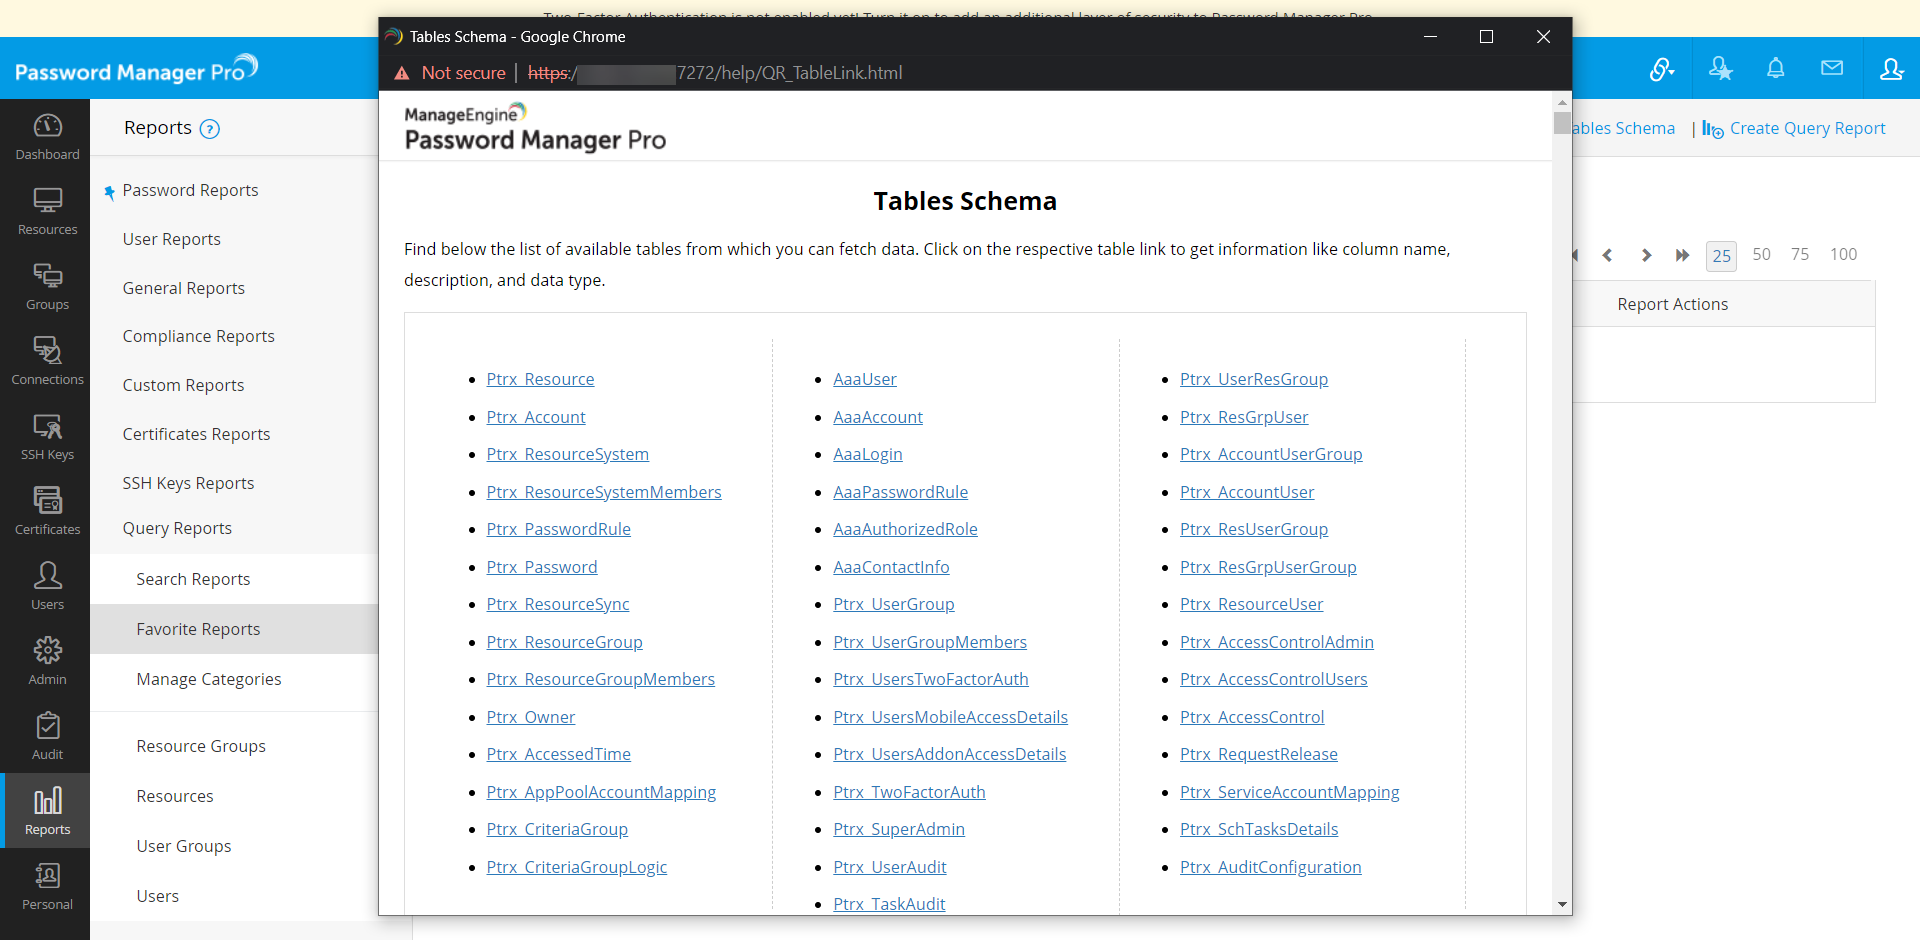
- Enter the SQL query to get the required information from the database. To know the available database tables from which you can query information, refer to the Tables Schema given at the top-right corner of the UI as shown below:
- Once you have entered the query, click Generate Report. If you have created the report for future use, click Save. The report will be saved.
- decrypt(COLUMNNAME) - To select any encrypted column while using encrypted columns, remember to give them alias names.
- How to know whether a column is encrypted? To know which columns are encrypted, go to Query Reports-->Tables Schema.
- In the dialog box that opens up, scroll down to the list that displays the column name, description, and data type of each table. Under data type, look for SCHAR. Columns of the data type SCHAR are encrypted.
Note: While writing your own SQL query, following are the placeholders that can be used:
Other placeholders:
2. Use Case Scenarios
Find below the SQL statements written for a few use case scenarios.
Use Case Scenario 1:
Passwords that haven't been changed after being used for auto-logon to target system
This report helps you to ascertain whether the passwords checked-out by users for auto-logon to a target system, were reset after use. Resetting a password after user access is critical, since it is possible the user may have noted down the password for future use. Therefore, using this query report, you can get the list of passwords not yet reset after auto-logon and update them instantly.
For PGSQL:
SELECT Ptrx_Resource.RESOURCENAME AS "Resource Name", Ptrx_Account.LOGINNAME AS "Account Name", Ptrx_DummyPwdNotChan.retrievedtime AS "Lastaccessedtime", Ptrx_ResourceSystem.OPERATINGSYSTEM AS "Type", Ptrx_Resource.LOCATION AS "Location", Ptrx_Resource.RESOURCEDESC AS "Description" FROM (SELECT accountid, retrievedtime FROM (SELECT Ptrx_DummyPwdRetr.accountid AS accountid,Ptrx_DummyPwdRetr.accessedtime AS retrievedtime, Ptrx_DummyPwdChanged.time AS time FROM (SELECT RESOURCEID, ACCOUNTID, max(LASTACCESSEDTIME) AS accessedtime FROM Ptrx_UserAudit inner join Ptrx_AuditConfiguration on Ptrx_AuditConfiguration.CONF_ID=Ptrx_UserAudit.OPERATIONTYPE WHERE Ptrx_AuditConfiguration.OPERATION_TYPE='Password Retrieved' AND REASON LIKE '%auto logon helper reason%' GROUP BY RESOURCEID,ACCOUNTID ) Ptrx_DummyPwdRetr LEFT JOIN ( SELECT ACCOUNTID ,max(LASTACCESSEDTIME) AS time FROM Ptrx_UserAudit inner join Ptrx_AuditConfiguration on Ptrx_AuditConfiguration.CONF_ID=Ptrx_UserAudit.OPERATIONTYPE WHERE Ptrx_AuditConfiguration.OPERATION_TYPE ='Password Changed' GROUP BY ACCOUNTID) Ptrx_DummyPwdChanged ON Ptrx_DummyPwdRetr.accountid=Ptrx_DummyPwdChanged.accountid AND Ptrx_DummyPwdChanged.time %GREATERTHAN% Ptrx_DummyPwdRetr.accessedtime ) AS Ptrx_DummyPwdRetrAndChan WHERE Ptrx_DummyPwdRetrAndChan.time IS NULL ) AS Ptrx_DummyPwdNotChan INNER JOIN Ptrx_Account ON Ptrx_DummyPwdNotChan.accountid=Ptrx_Account.ACCOUNTID INNER JOIN Ptrx_Resource ON Ptrx_Resource.RESOURCEID=Ptrx_Account.RESOURCEID INNER JOIN Ptrx_ResourceSystemMembers ON Ptrx_ResourceSystemMembers.RESOURCEID =Ptrx_Resource.RESOURCEID INNER JOIN Ptrx_ResourceSystem ON Ptrx_ResourceSystem.OSID=Ptrx_ResourceSystemMembers.OSID ORDER BY Ptrx_Resource.RESOURCENAME
Use Case Scenario 2:
Password that haven't been changed at all after resource creationUse this report to determine the list of passwords that have not been reset even once after resource creation in Password Manager Pro. Periodic password resets are important and this report helps track all the resources that have outdated passwords. You can also rewrite the following query to find out the passwords haven't been changed for resources, added during a particular period.
SELECT Ptrx_Resource.RESOURCENAME AS "Resource Name", Ptrx_Account.LOGINNAME AS "Account Name", Ptrx_ResourceSystem.OPERATINGSYSTEM AS "Type", Ptrx_Resource.LOCATION AS "Location", Ptrx_Resource.RESOURCEDESC AS "Description" FROM ( SELECT Ptrx_Account.ACCOUNTID AS accountid, Ptrx_Resource.RESOURCEID FROM Ptrx_Account INNER JOIN Ptrx_Resource ON Ptrx_Resource.RESOURCEID=Ptrx_Account.RESOURCEID WHERE accountid NOT IN (SELECT Ptrx_UserAudit.ACCOUNTID FROM Ptrx_UserAudit FULL OUTER JOIN (SELECT accountid,lastaccessedtime,OPERATION_TYPE FROM Ptrx_UserAudit inner join Ptrx_AuditConfiguration on Ptrx_AuditConfiguration.CONF_ID=Ptrx_UserAudit.OPERATIONTYPE WHERE Ptrx_AuditConfiguration.OPERATION_TYPE LIKE 'Account Added') AS Ptrx_DummyAccAdded ON Ptrx_UserAudit.ACCOUNTID=Ptrx_DummyAccAdded.accountid AND Ptrx_UserAudit.lastaccessedtime %GREATERTHAN% Ptrx_DummyAccAdded.lastaccessedtime WHERE Ptrx_DummyAccAdded.OPERATION_TYPE LIKE 'Password Changed' AND Ptrx_UserAudit.lastaccessedtime BETWEEN Ptrx_DummyAccAdded.lastaccessedtime AND (Ptrx_DummyAccAdded.lastaccessedtime::timestamp::date)+INTERVAL '5' day ) ) AS Ptrx_DummyPwdNotChan INNER JOIN Ptrx_Account ON Ptrx_DummyPwdNotChan.accountid=Ptrx_Account.ACCOUNTID INNER JOIN Ptrx_Resource ON Ptrx_Resource.RESOURCEID=Ptrx_Account.RESOURCEID INNER JOIN Ptrx_ResourceSystemMembers ON Ptrx_ResourceSystemMembers.RESOURCEID =Ptrx_Resource.RESOURCEID INNER JOIN Ptrx_ResourceSystem ON Ptrx_ResourceSystem.OSID=Ptrx_ResourceSystemMembers.OSID ORDER BY Ptrx_Resource.RESOURCENAME
3. Scheduling Query Reports
Once you have created and saved a query report, you can also schedule them to be automatically generated on a periodic basis. Following are the steps required to schedule a report:
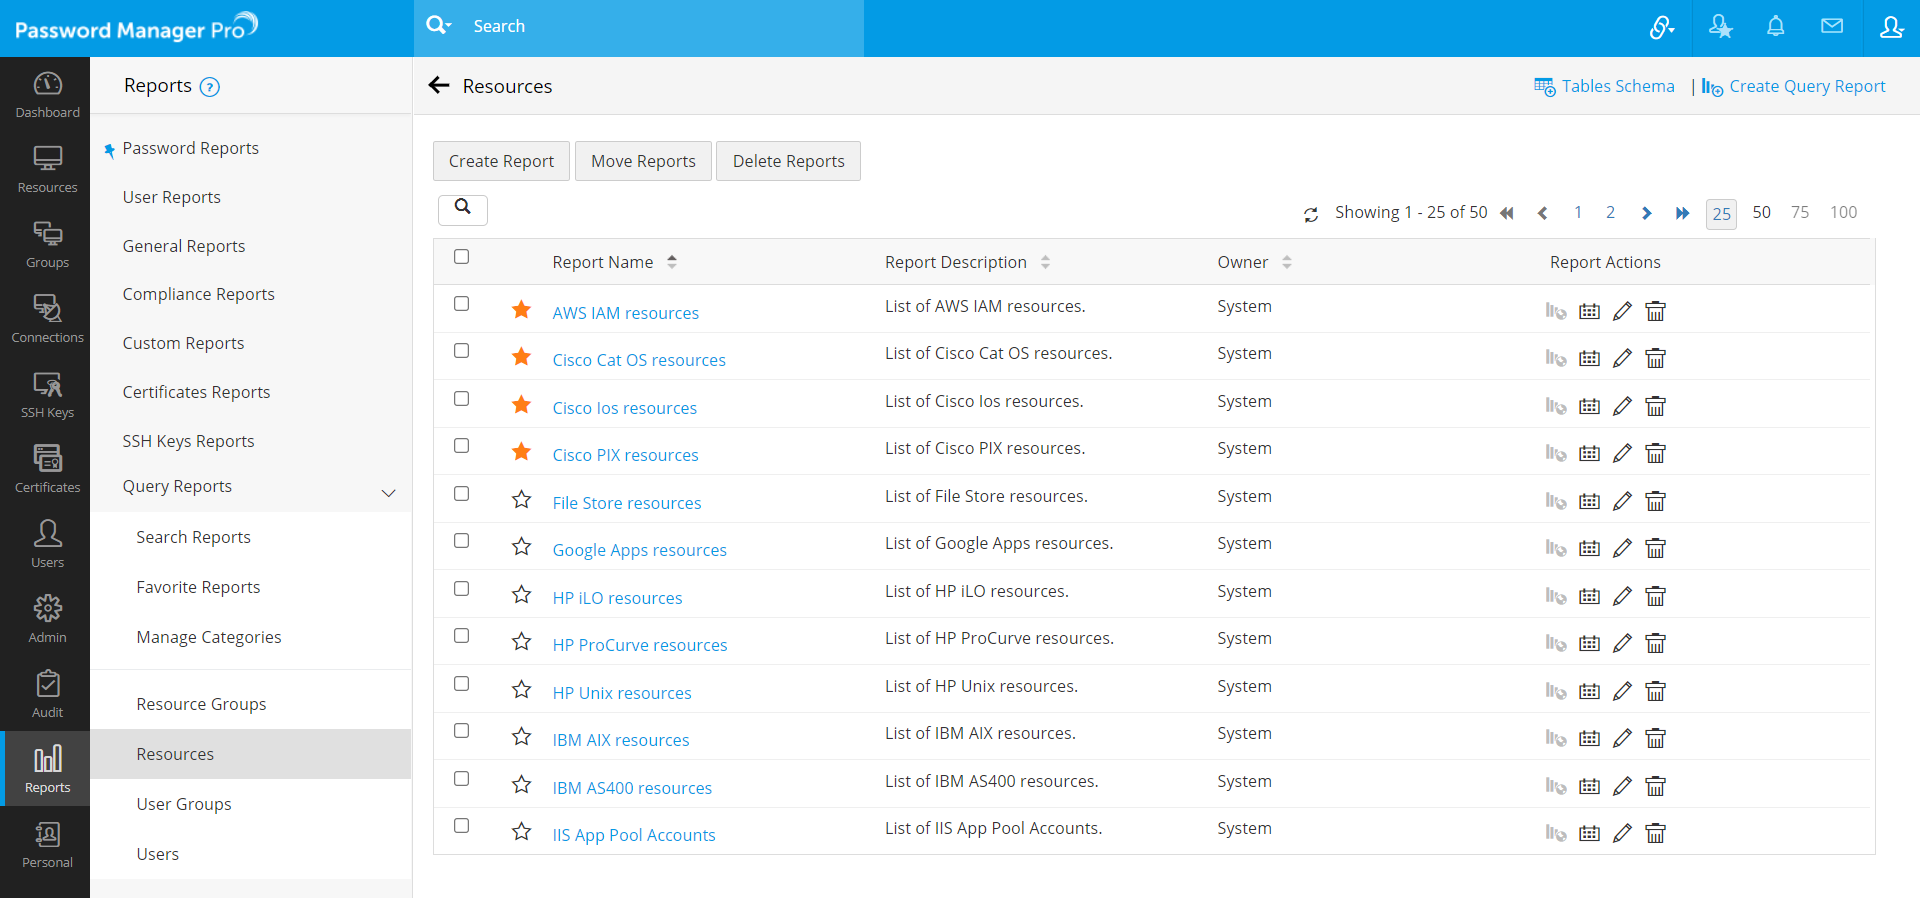
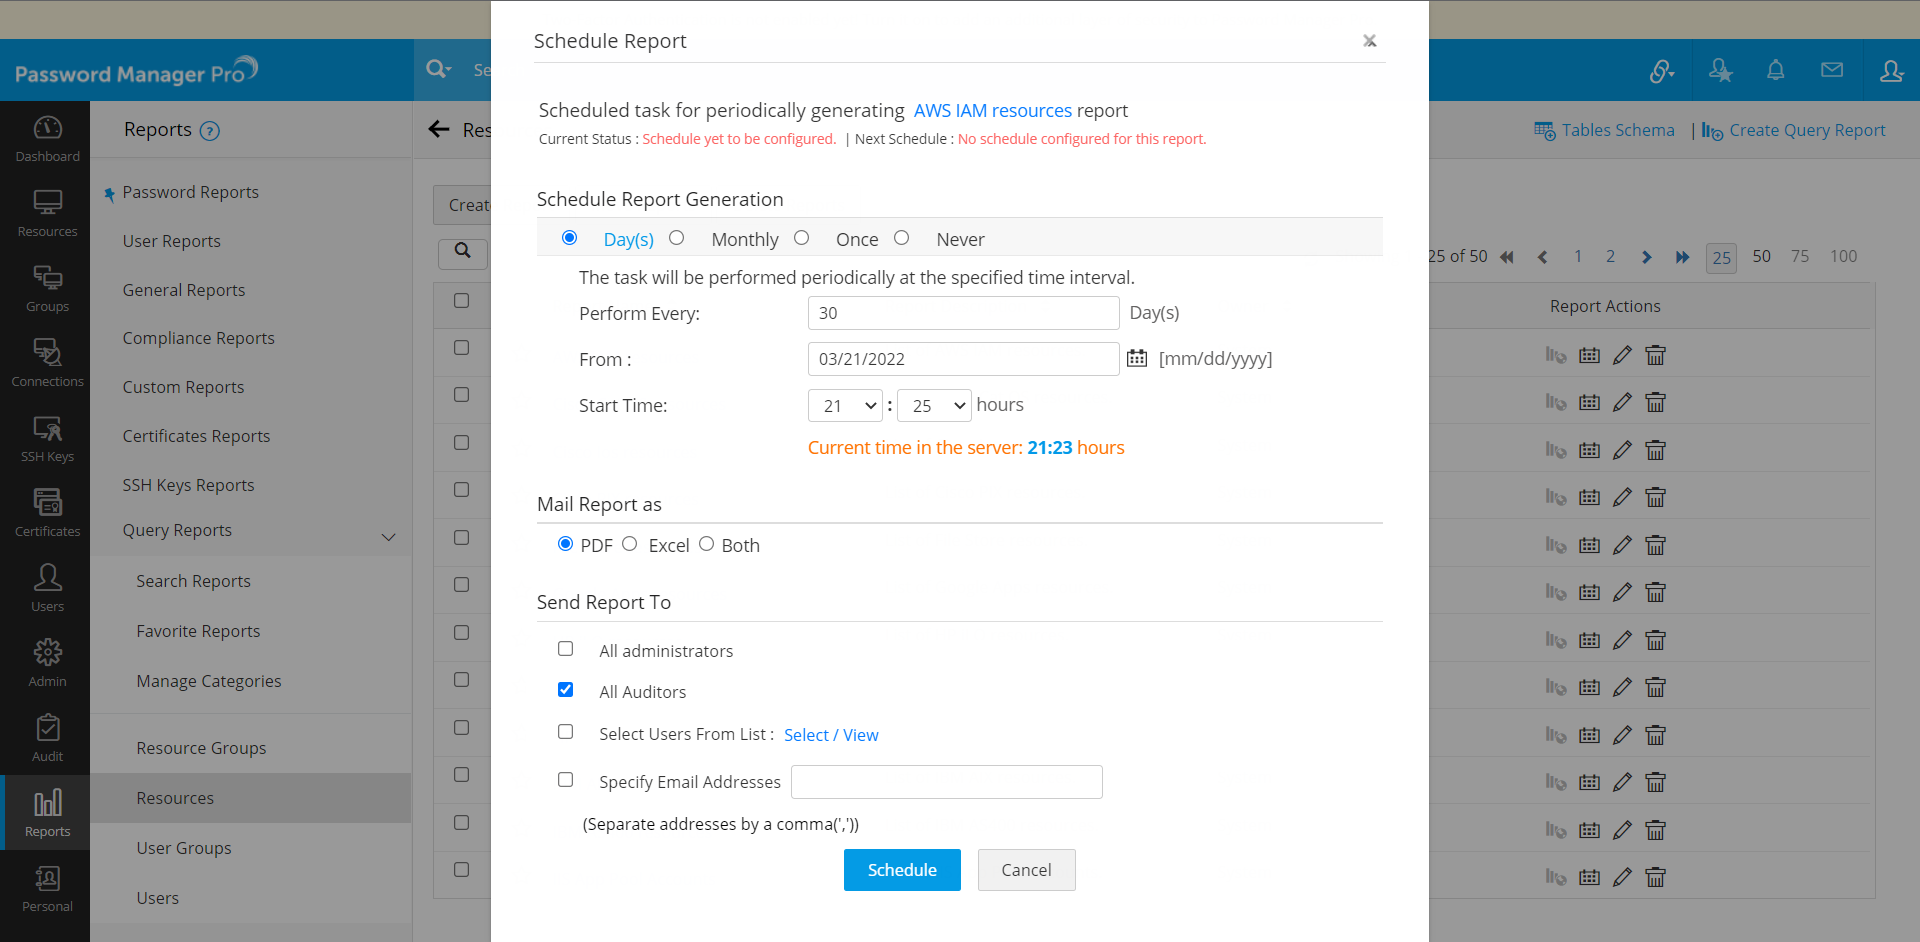
- Navigate to Reports >> Query Reports >> Resources. (As shown in the left pane of the image below)
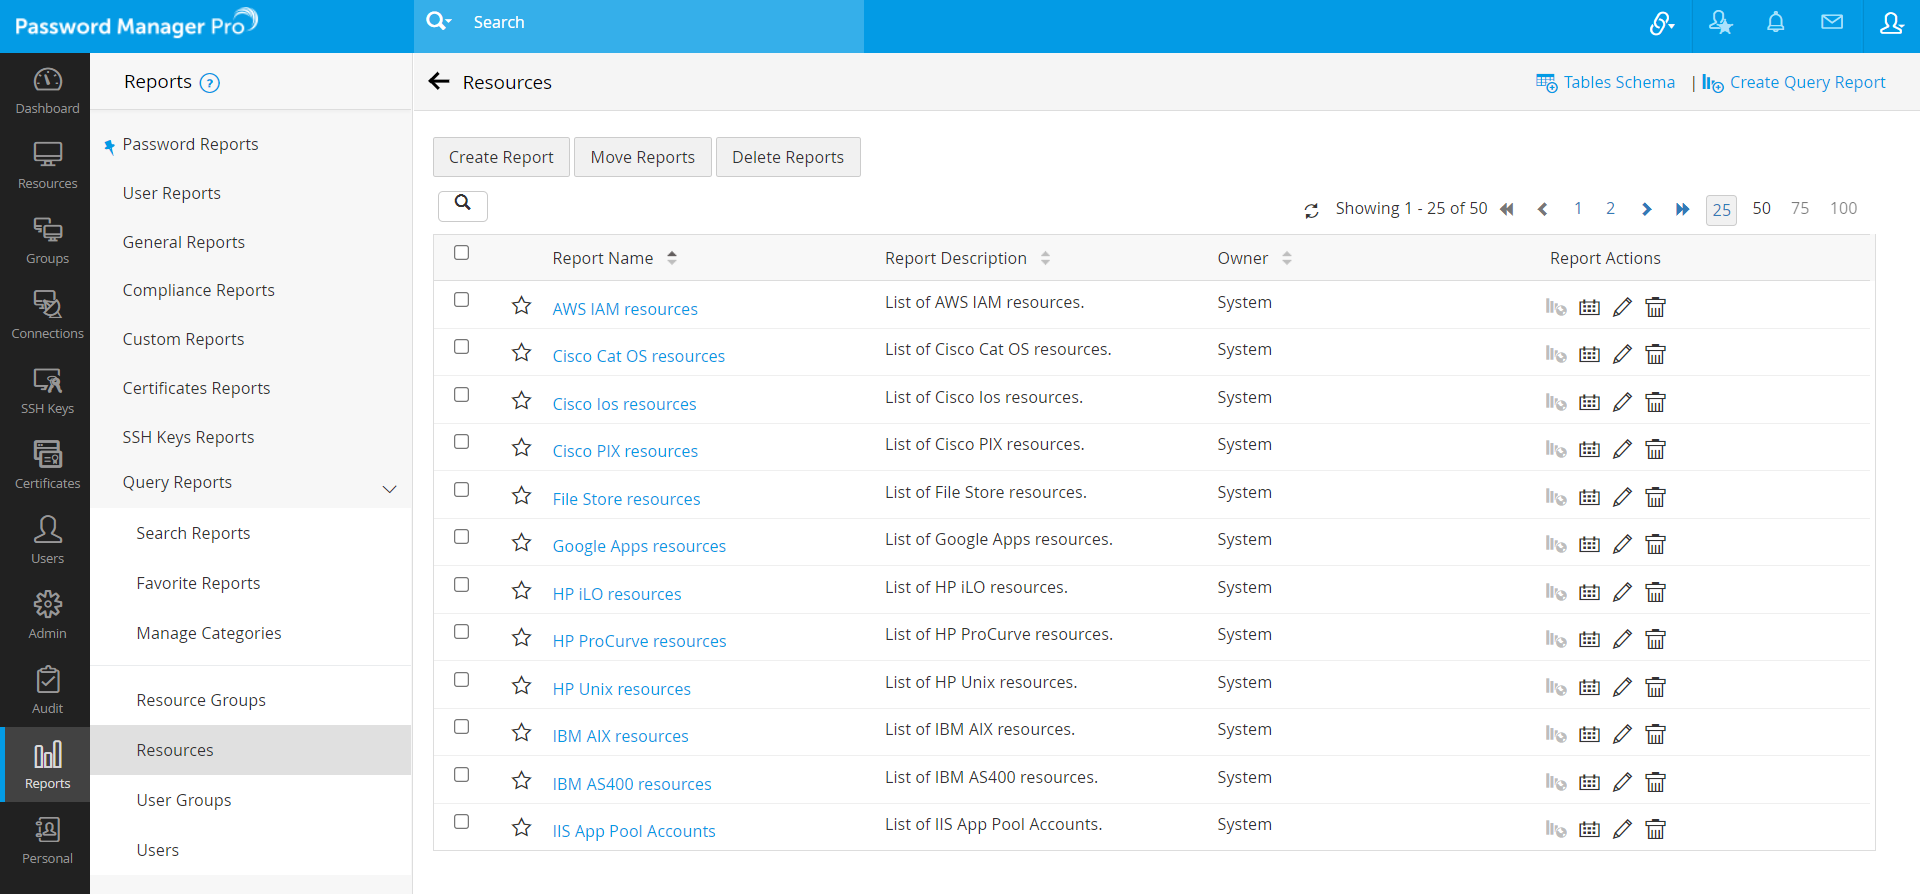
- Locate the required report and click on the Schedule Report icon under the Report Actions column beside the report.
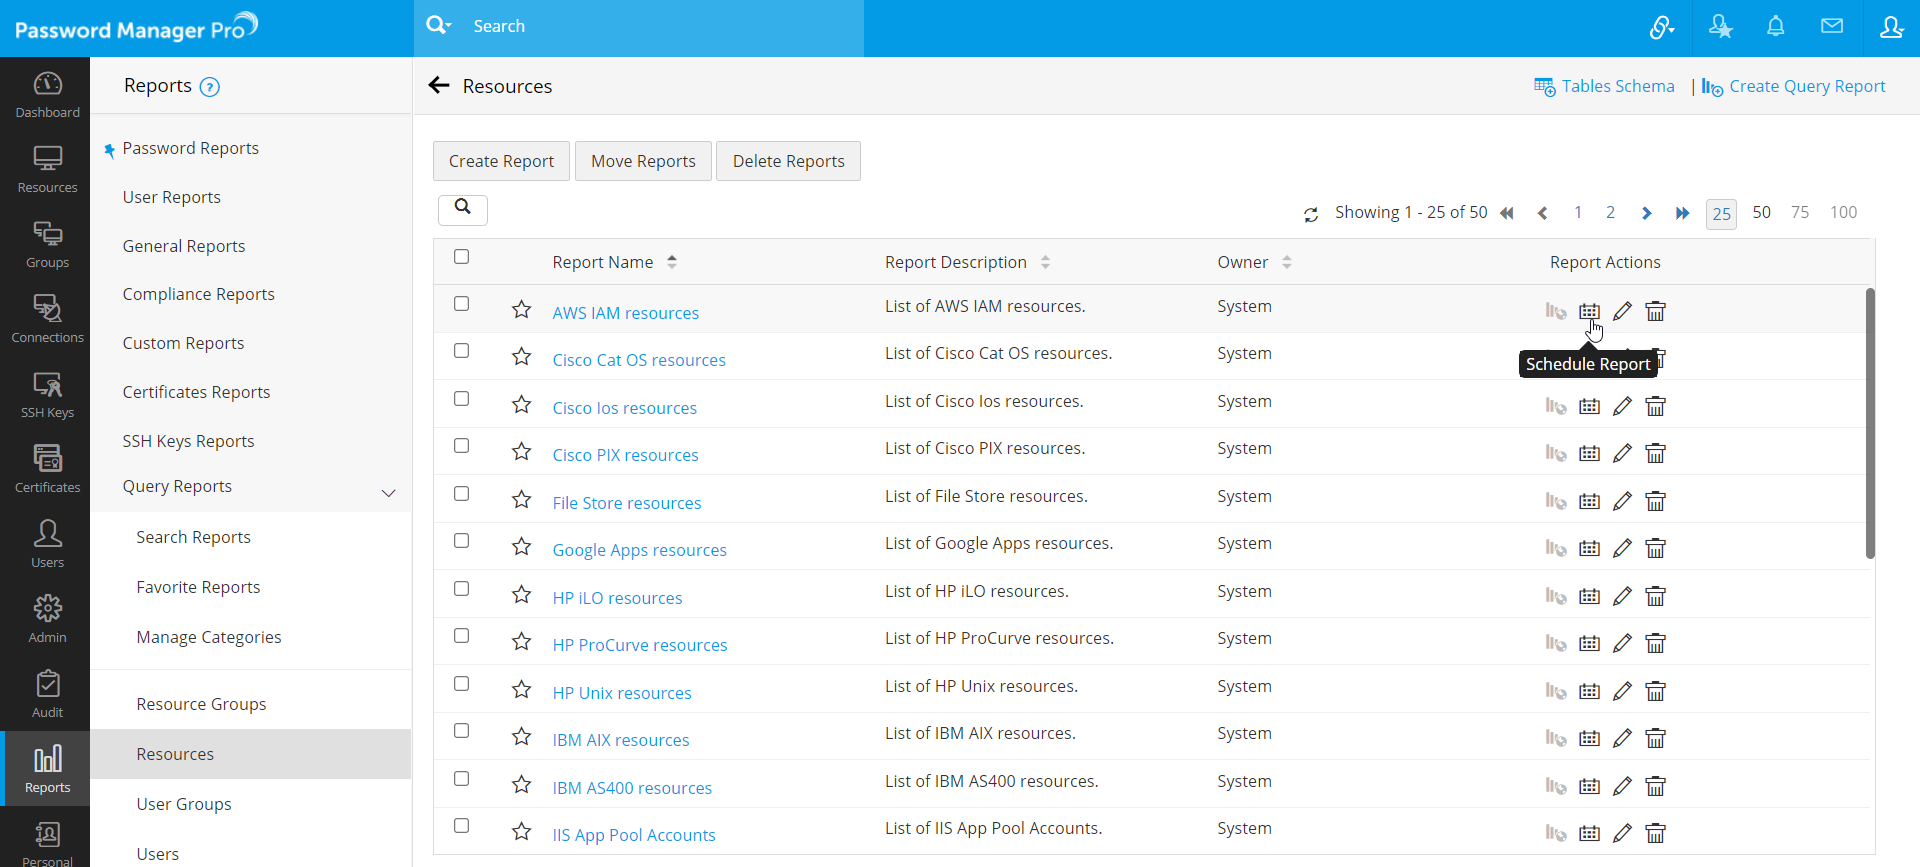
- In the pop up form that opens, select the required schedule - day(s) / monthly / once, and also provide the date / time at which the schedule has to commence.
- Next, choose the format in which the report has to be mailed to the recipients, PDF or XLS or both.
- Select the recipients to whom the report should be mailed to, from the given options. You can also provide a custom list of email ids instead.
- Click Schedule.
4. Terminating an Already Created Schedule
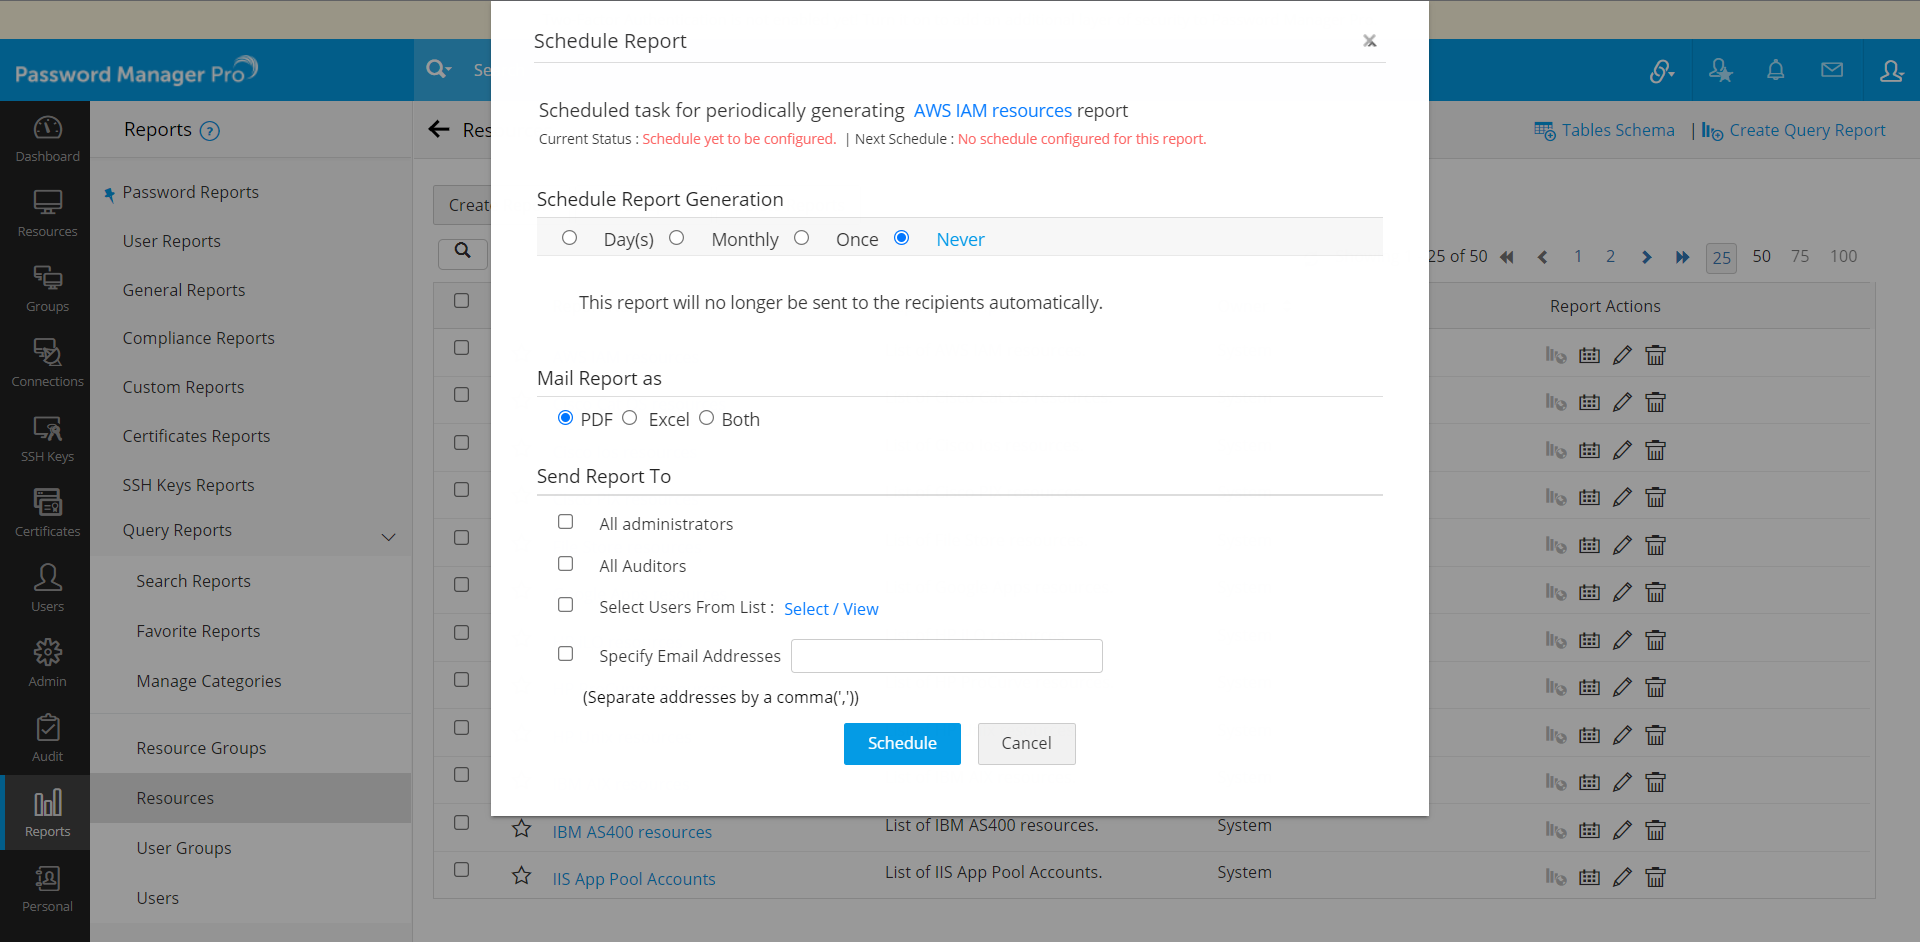
- Click on the Schedule Report icon under the Report Actions column beside the report.
- In the pop-up form that opens, select the option Never.
- Click Schedule. The schedule will be terminated.
5. Creating Favorite Reports
To easily locate a frequently used or critical report, you can mark the report as favorite by clicking on Mark as Favorite star icon shown before the name of each report.
6. Managing Categories
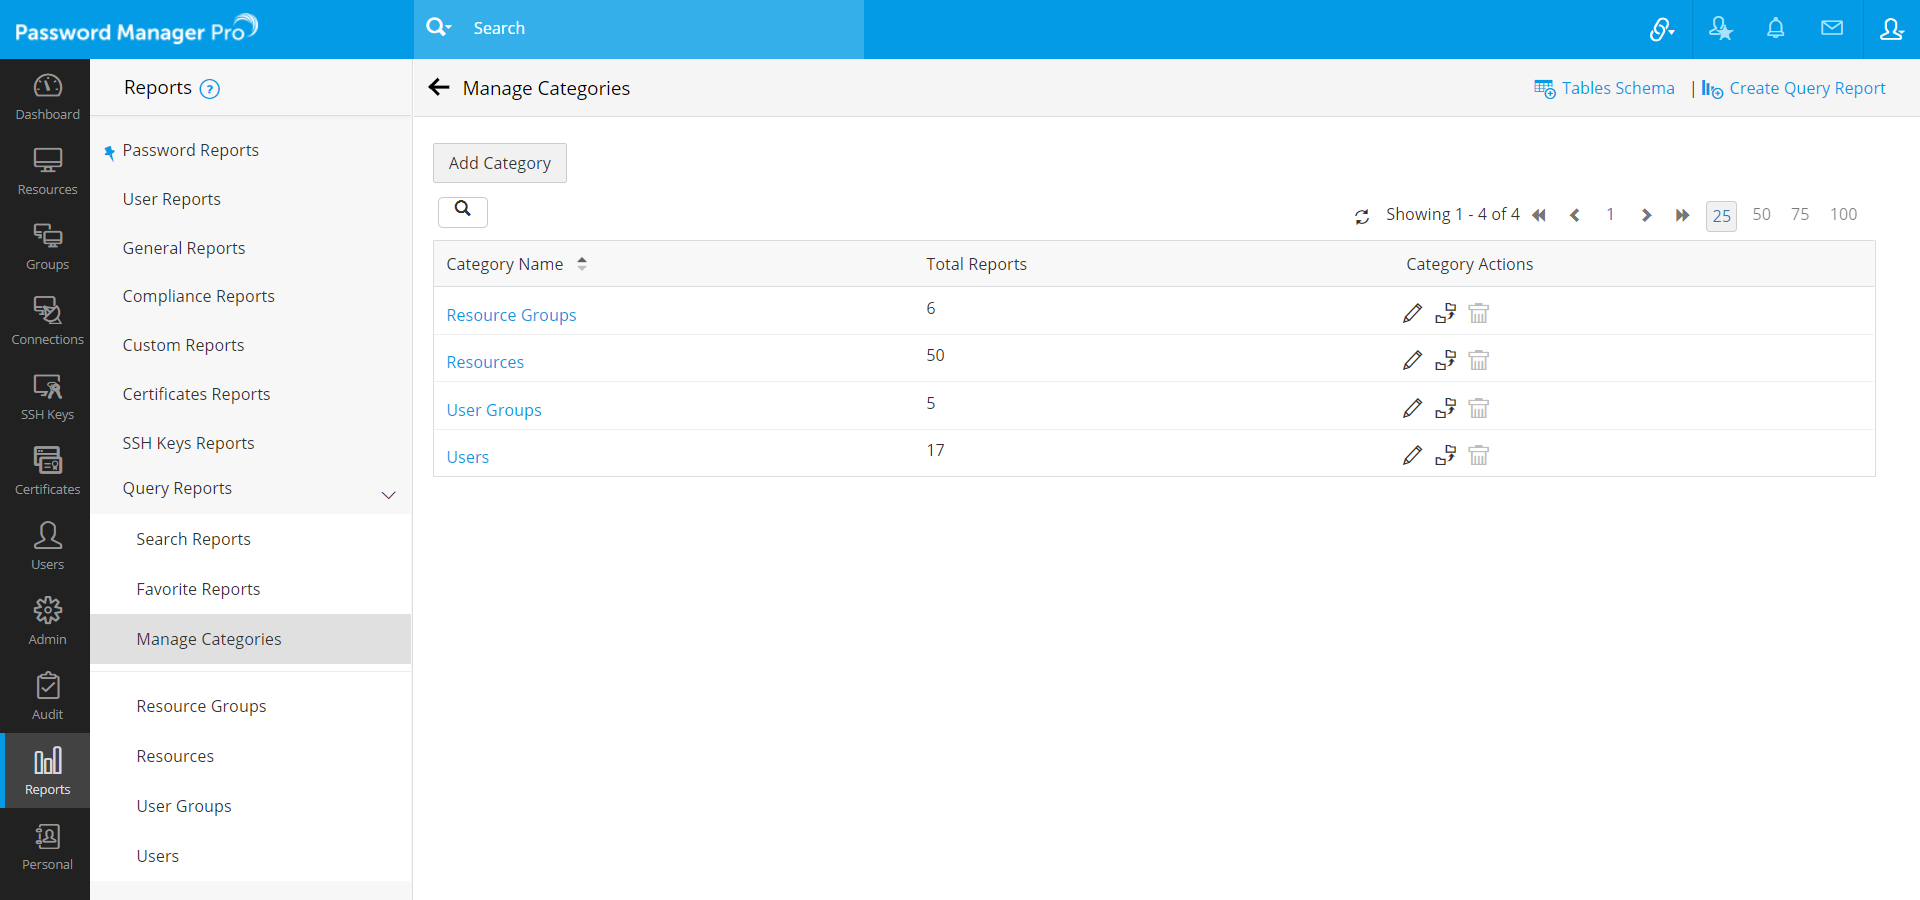
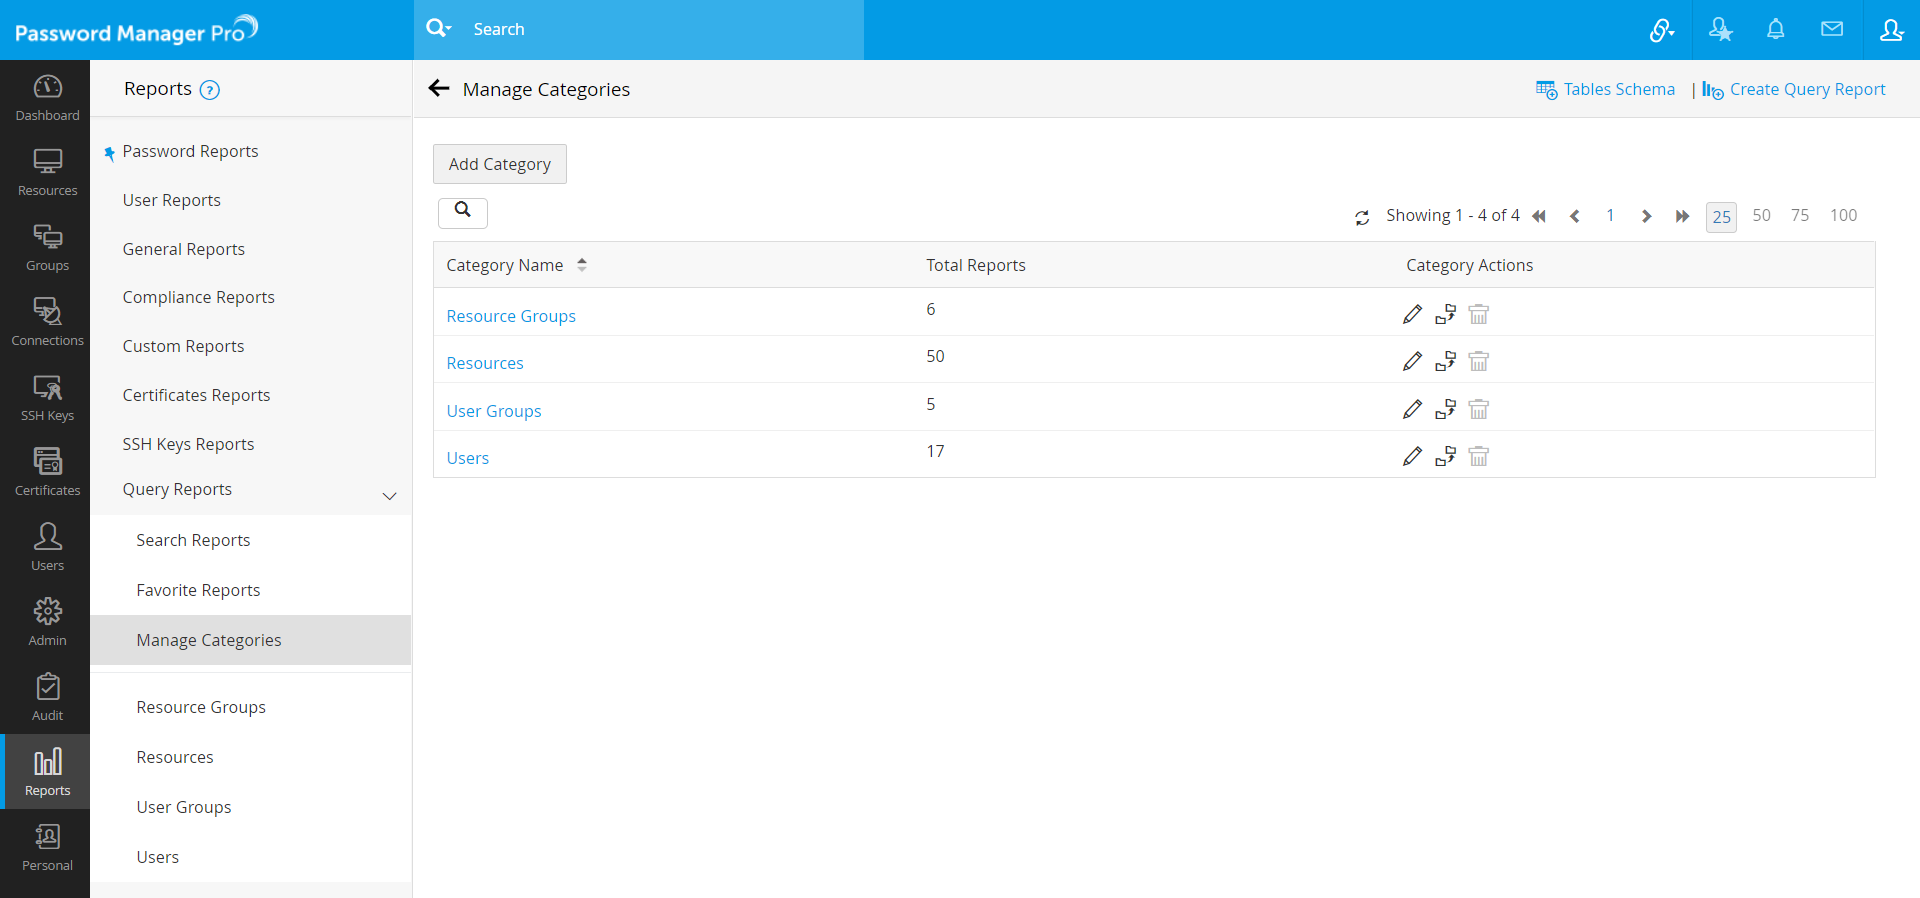
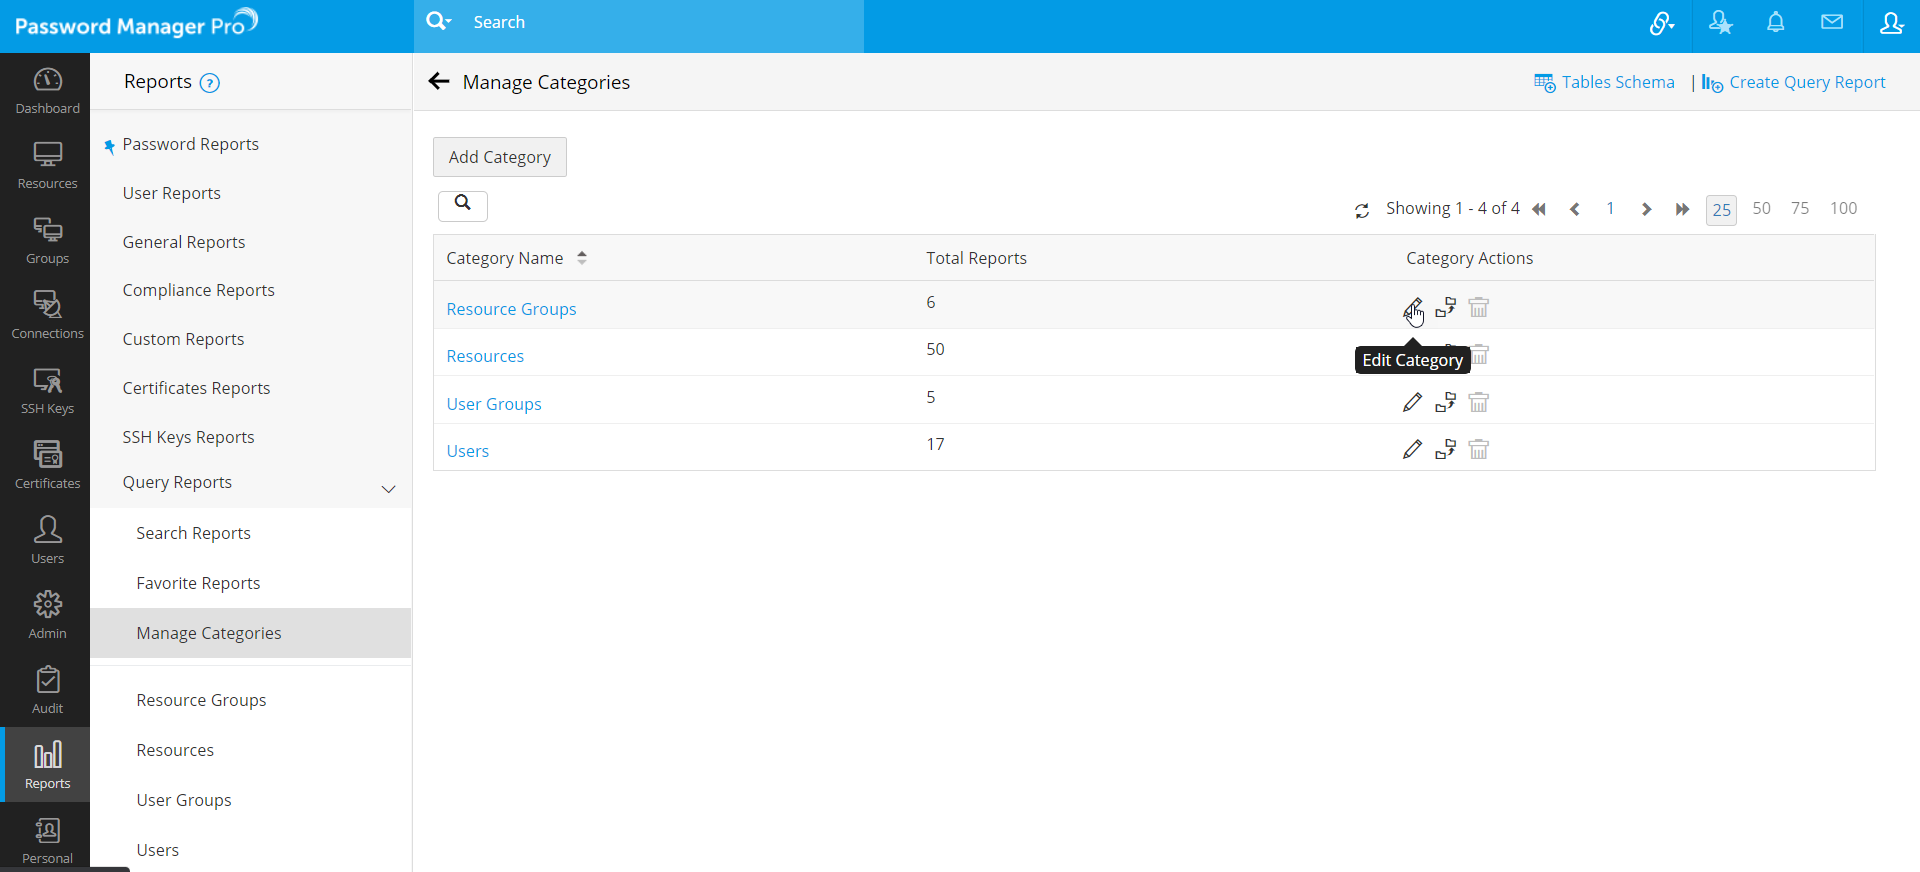
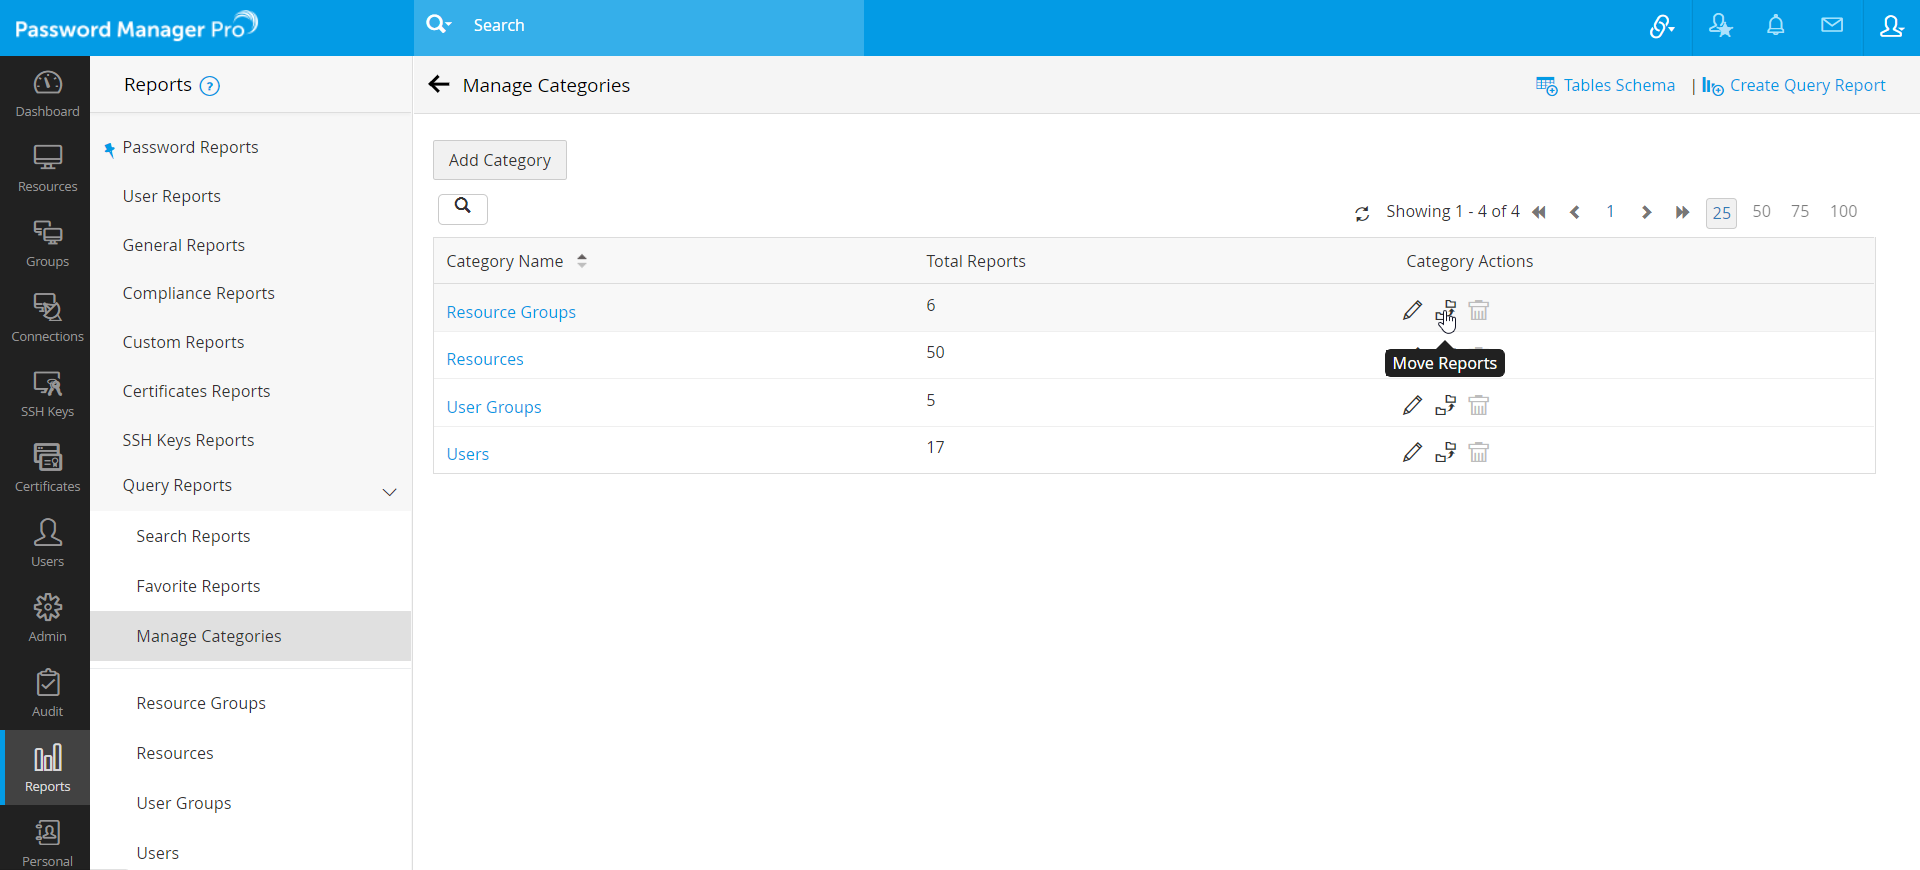
To add/modify/delete categories, go to Reports >> Query Reports >> Manage Categories. (As shown in the left pane of the image below)
6.1 Editing a Category
- Click the Edit Category icon present against the desired category, under the Category Actions column.
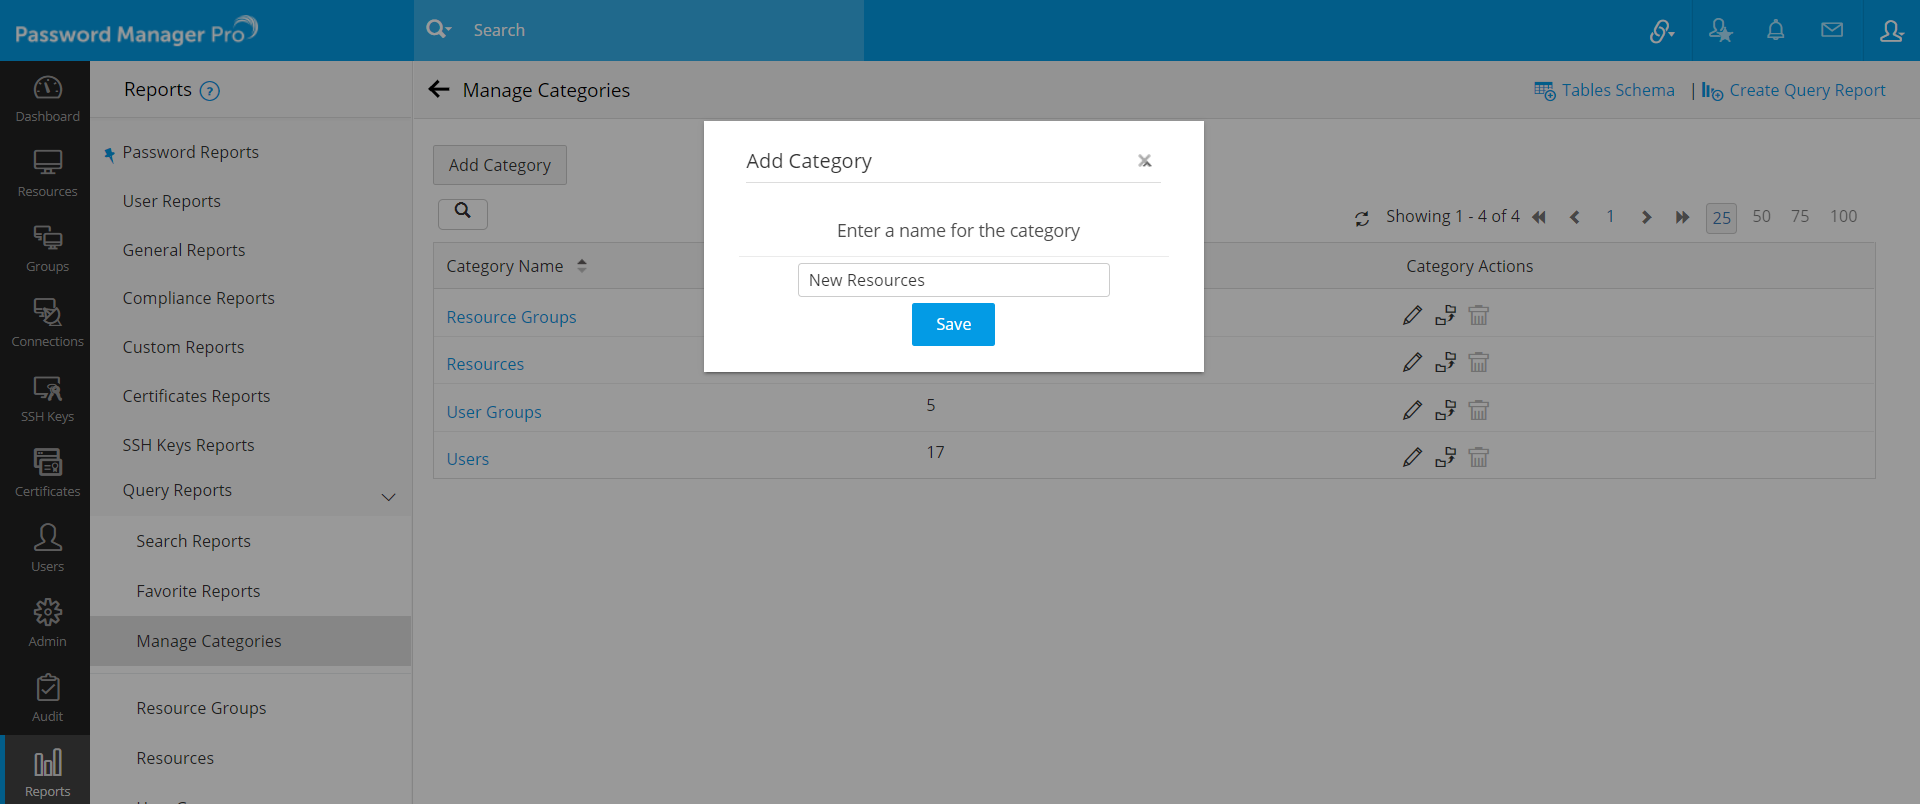
- In the pop-up form that opens, you can change the name for the category and click Save.
6.2 Deleting a Category
- Click the Delete Category icon present against the desired category, under the Category Actions column.
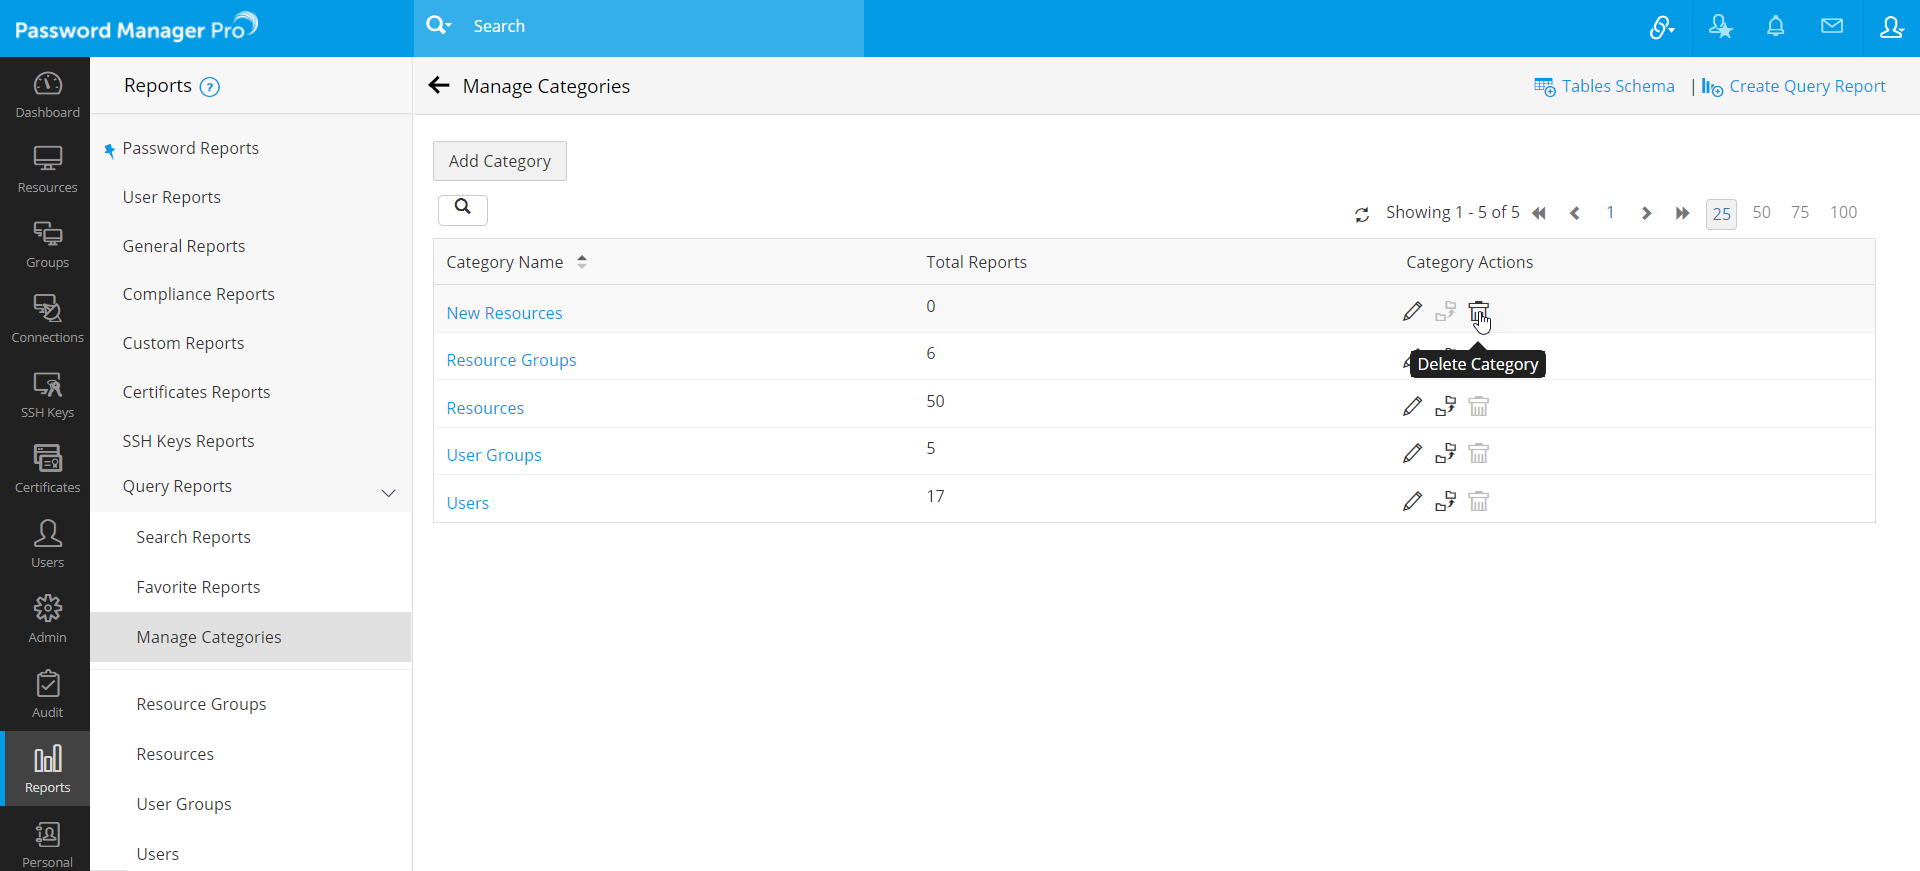
- In the pop-up form that appears, click OK.
Note: In order to delete a category, you have to first ensure that no reports exist under it. If there are reports, you can move them to another category.
6.3 Moving Reports from One Category to Another
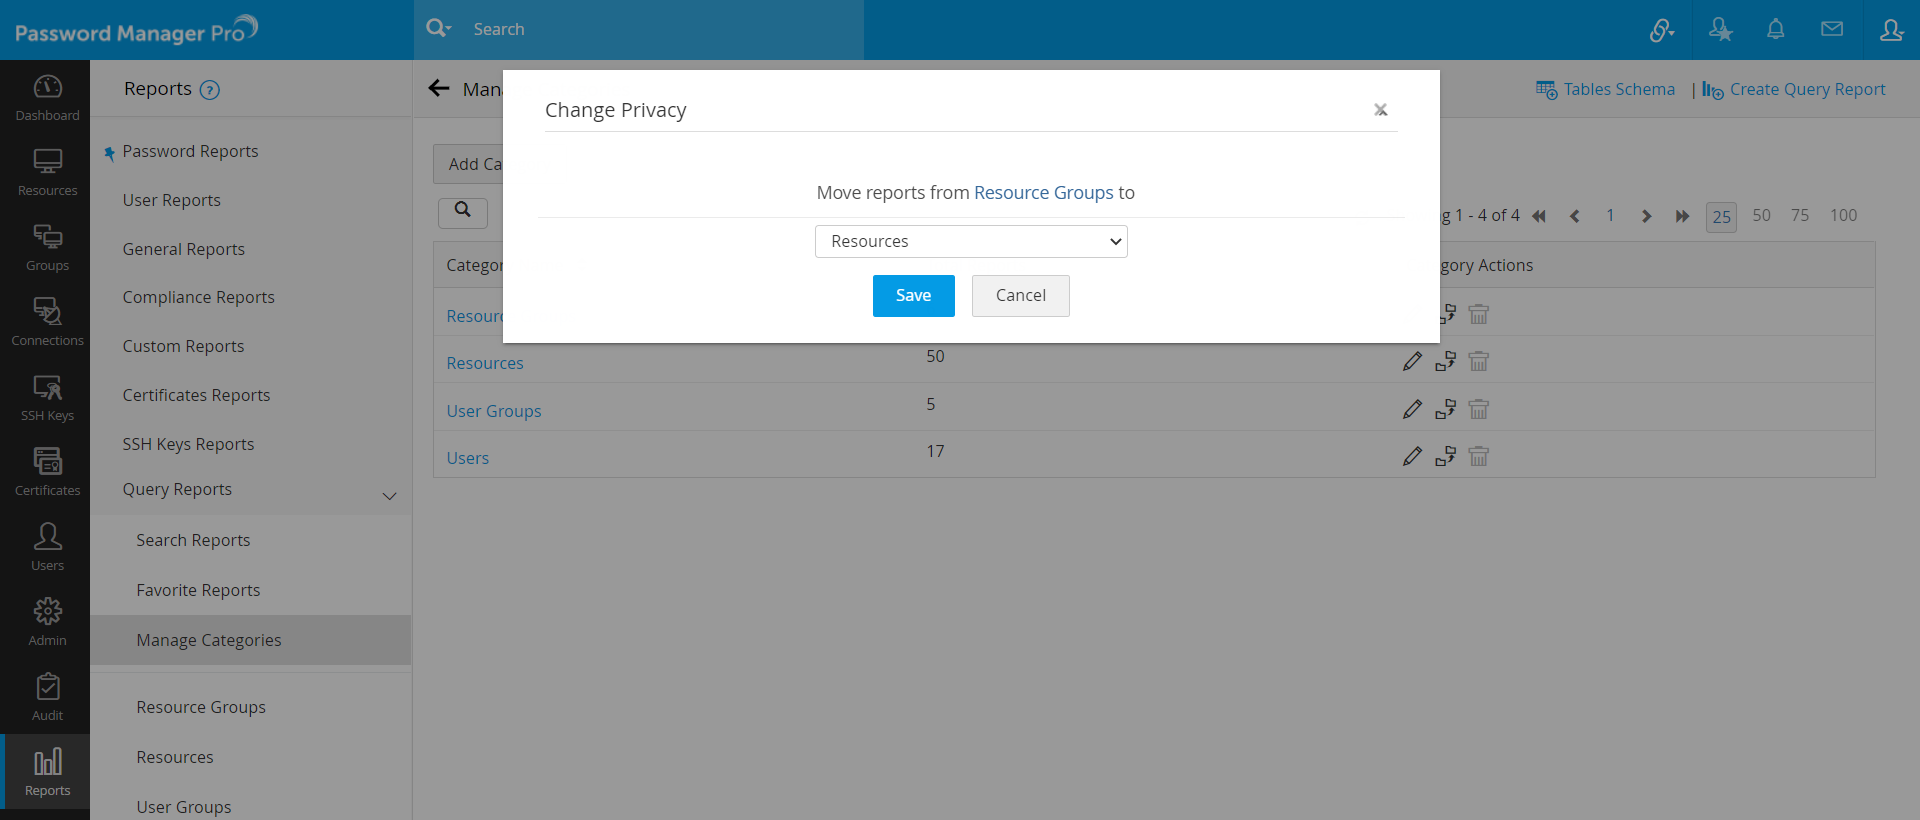
- Click the Move Reports icon present against the desired category, under Category Actions column.
- In the pop-up form that opens, choose the category to which the reports must be moved and click Save.
©2025, ZOHO Corp. All Rights Reserved.
